Focus on Sewing
A place to share my successes (and failures) in sewing.
Friday, January 11, 2013
Round Bolster Pillow
Sometime back, around the end of November or early December, my friend asked to make a bolster pillow for the bench she recovered and put in her front entry. During our discussion of what she wanted, I kept leaning toward a round pillow. I don’t know why I wanted to make a round pillow so badly. Perhaps, because I never made one and wanted to try. She was game for it so that’s what we decided on.
I brought my machine over and got to work on the same day that we made our Christmas cards. You can see the post, Good Friends and Christmas Cards, on my other blog, Crazywonderfullife, for that story. She had everything I needed, fabric and cording, whew! long list, to make the pillow, so after lunch I got started on that.
First, I took some measurements to determine the size of the pillow. She wanted it to be the whole length of the bench, and not too big around, so people could still sit comfortably to put shoes on.
Next, I cut strips of the fabric and covered enough cording to go around both ends of the pillow. I had to determine the circumference of the circles of fabric that would be sewn on the ends. There is a mathematical equation for that, but I just used my measuring tape and measured around the outside of each circle.
I also needed to know the circumference to determine what size rectangle I would need for the body of the pillow. The long side was the length of the bench and the short side was the circumference of the end circles.
The third step was sewing the covered cording to each of the short sides of the rectangle.
You will come to know that my photography skills are seriously lacking. I may or may not choose to change that in the future.
After that, I pinned the round end pieces to the short sides of the rectangle. She wanted the reverse side of the fabric to show on the ends so it was right side to wrong side. I found out that my rectangle was to big so I unpinned everything and remeasured and trimmed it down to the correct size.
This time, I folded the rectangle in half, long side to long side, and right sides together and sewed that together first, leaving an opening for turning and stuffing.
Now, I pinned the ends on again, keeping in mind that the wrong side of the fabric needed to face out when finished, and sewed the ends on. I trimmed what needed to be trimmed, turned it right side out and stuffed it with polyester stuffing.
I sewed the opening together by hand and voila! a round bolster pillow for ze bench.
Not bad for a first time with no pattern or instructions.
Next time, I’ll show you a quilt that I’m making for my cousin. For a sneak peek at the work in progress, go to Quilt In Progress. Until then,
Happy Sewing!
Julie
Thursday, December 13, 2012
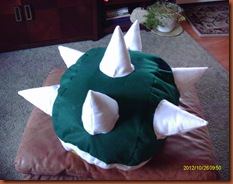
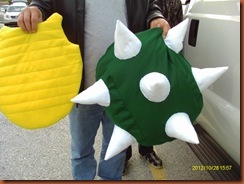
Project #1- Bowser Shell Costume
I know it’s a little late for Halloween costumes, but I have these pictures ready and I need to get started with this blog.


I was “commissioned” to create the shell portion of a Bowser costume for my nephew’s friend. We couldn’t find a pattern for it, just a picture and a not-very-good tutorial for someone else’s project. I will describe how I made it, but I wouldn’t recommend trying to do it this way.
I had to use my sister-in-law, who is about the same size as the boy who will be wearing the costume, for a model. First, I measured her back length and shoulder width so I could get an approximate size. I cut a rectangle piece of green felt to the width and about 1 1/3 times the length. Then I cut 2 half circles to the length that I needed and pinned then stitched them to the sides of the rectangle.
Next, I cut yellow felt in an oval to the approximate size of the child’s back. Remember, this is completely free hand with no pattern. I measured around the oval to get a circumference for the white felt band. I cut the white felt to length and stitched one side to the yellow. Then, I pinned right sides of green and yellow together so the white was in between, and stitched them together leaving an opening in the bottom so I could turn it right side out and stuff it with fiber filling. I hand stitched to other side of the white band to the green shell.
For the cones, I undid a child’s paper party hat and traced it onto the white felt. I stitched the sides together, clipped the inside of the points, and turned them right side out. I stuffed them with fiber fill before pinning them to outside of the shell. I just used the raw edges of the felt instead of trying to turn it under. Felt won’t ravel and has a nice edge so this works for this project. Finally, I hand stitched the cones to the shell.
Yellow Breastplate
I cut two yellow ovals of felt about the same size as the yellow oval for the shell, and 1 from batting. I had extra polyester batting from a seat cover redo that I used. I cut out a notch for the neck and one for each arm. I placed the batting on top of the two pieces of felt and stitched all three layers together leaving an opening in the bottom to turn it so the batting was on the inside and then I hand-stitched the opening closed. Next, I started at an approximate center point and stitched all the way across from side to side. I stitched more lines from the center out at about 1 1/2 inch. intervals.
Voila!
My sister-in-law connected the two pieces together with yellow elastic and it was a huge success! Also, the costume included a yellow sweatsuit and a paper mache hat.
Happy Sewing!
Julie
Subscribe to:
Posts (Atom)